영어가 아닌 유니코드 문자 로드 시 internal server error가 발생한다. Flask 개발서버 사용 시에는 이런 문제가 발생하지 않는다.
/etc/apache2/envvars 파일에서 다음 부분을 찾아서 주석을 해제한다.
## Uncomment the following line to use the system default locale instead:
. /etc/default/localeIT 기술
영어가 아닌 유니코드 문자 로드 시 internal server error가 발생한다. Flask 개발서버 사용 시에는 이런 문제가 발생하지 않는다.
/etc/apache2/envvars 파일에서 다음 부분을 찾아서 주석을 해제한다.
## Uncomment the following line to use the system default locale instead:
. /etc/default/localeFlutter_blue 패키지 버전 0.8.0에서 안드로이드 에뮬레이터, 혹은 안드로이드 디바이스에서 예제코드를 실행할 때에 다음과 같은 에러가 발생하면서, 제대로 작성이 되지 않는다. (iOS 타겟에서는 제대로 작동한다)
FAILURE: Build failed with an exception.

* What went wrong:
Execution failed for task ':flutter_blue:generateDebugProto'.
> Could not resolve all files for configuration ':flutter_blue:protobufToolsLocator_protoc'.
   > Could not find protoc-3.11.4-osx-aarch_64.exe (com.google.protobuf:protoc:3.11.4).
     Searched in the following locations:
         https://repo.maven.apache.org/maven2/com/google/protobuf/protoc/3.11.4/protoc-3.11.4-osx-aarch_64.exe

* Try:
Run with --stacktrace option to get the stack trace. Run with --info or --debug option to get more log output. Run with --scan to get full insights.

* Get more help at https://help.gradle.org

BUILD FAILED in 16s
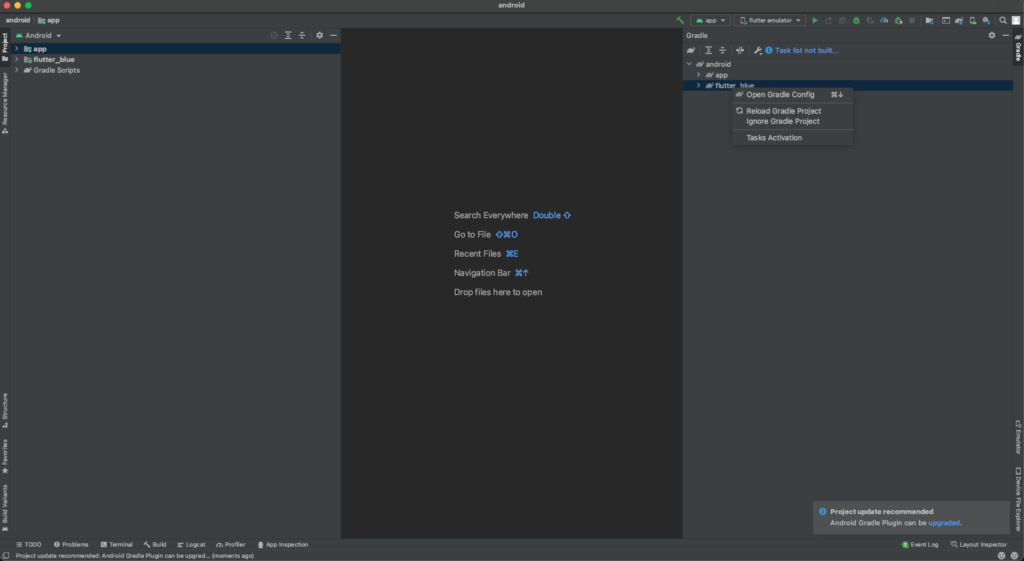
위의 에러를 해결하기 위해서는 Gradle info를 수정해주어야 한다.
Android Studio를 실행하여 flutter앱이 위치한 폴더에 위치한 android 폴더를 프로젝트폴더로 지정하여 연다. 이후 프로젝트 로딩이 끝나면, 오른쪽편에 위치한 Gradle탭을 열고, android>flutter_blue 트리항목위에 마우스 커서를 올리고 오른쪽 버튼을 눌러 ‘Open Gradle Config’로 진입한다.
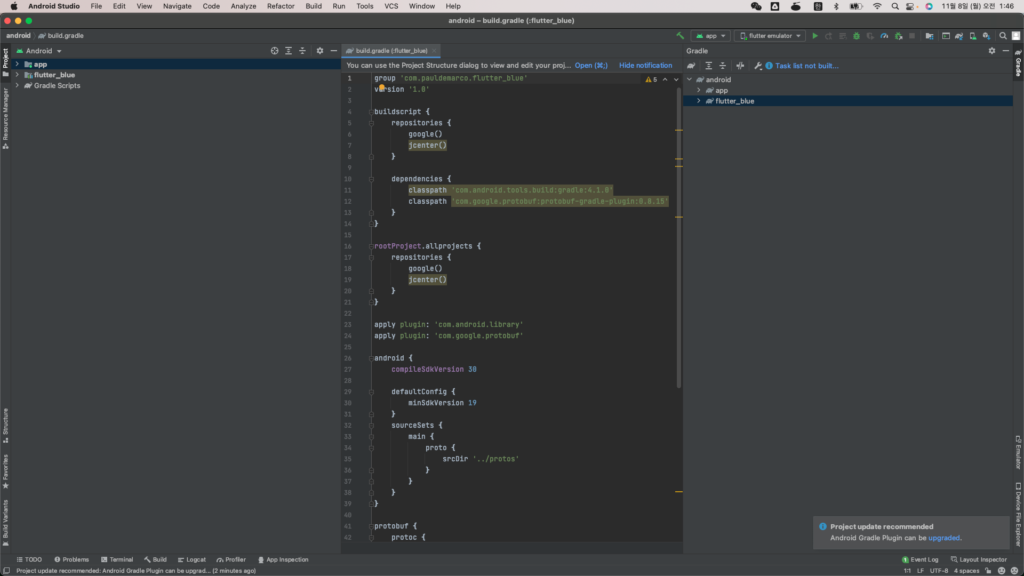
Config 내용 중 ‘
'com.google.protobuf:protoc:3.11.4' 을
'com.google.protobuf:protoc:3.17.3' 으로 수정한다.

'com.google.protobuf:protobuf-javalite:3.11.4'을
'com.google.protobuf:protobuf-javalite:3.17.3'으로 수정한다.

수정 후 config 중 해당부분의 내용은 다음과 같다.
protobuf {
    protoc {
        artifact = 'com.google.protobuf:protoc:3.17.3'
    }
    generateProtoTasks {
        all().each { task ->
            task.builtins {
                java {
                    option "lite"
                }
            }
        }
    }
}

dependencies {
    implementation 'com.google.protobuf:protobuf-javalite:3.17.3'
}
저장한 이후 Android Studio를 닫고, flutter에서 앱 시작을 해보면, 잘 실행되는 것을 볼 수가 있다.
/boot/config.txt 에 다음 내용을 추가하거나, 주석을 해제한다.
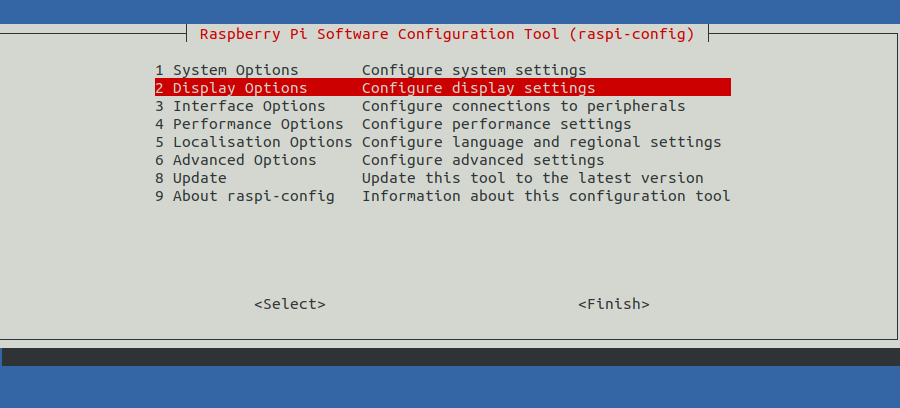
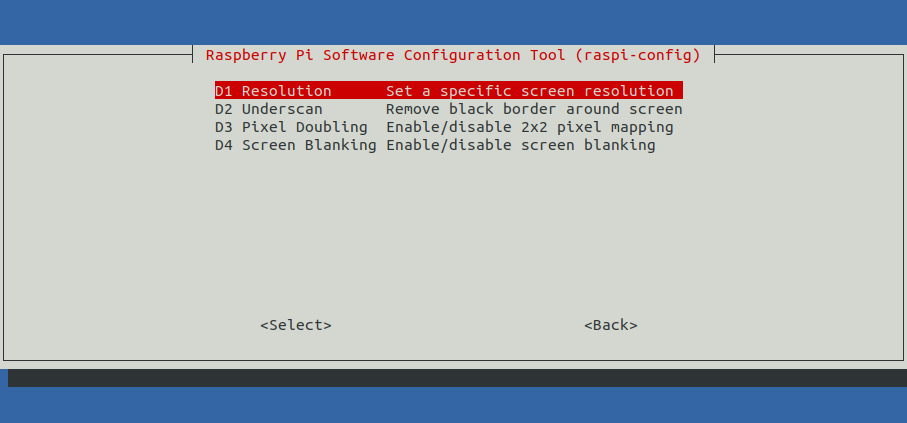
hdmi_force_hotplug=1해상도를 강제지정하려면, 터미널에서 sudo raspi-config를 실행하여 display 영역을 조절한다.
flutter로 작성한 앱을 아이폰 에뮬레이터에서 구동하려고 하니, 다음과 같은 에러가 발생.
Launching lib/main.dart on iPhone 13 in debug mode...
lib/main.dart:1
CocoaPods' output:
↳
      Preparing
    Analyzing dependencies
    Inspecting targets to integrate
      Using `ARCHS` setting to build architectures of target `Pods-Runner`: (``)
    Fetching external sources
    -> Fetching podspec for `Flutter` from `Flutter`
    -> Fetching podspec for `webview_flutter_wkwebview` from `.symlinks/plugins/webview_flutter_wkwebview/ios`
    Resolving dependencies of `Podfile`
Error output from CocoaPods:
↳
    /System/Library/Frameworks/Ruby.framework/Versions/2.6/usr/lib/ruby/2.6.0/rubygems/core_ext/kernel_require.rb:54:in `require': dlopen(/Library/Ruby/Gems/2.6.0/gems/ffi-1.15.4/lib/ffi_c.bundle, 9): no suitable image found.  Did find: (LoadError)
    	/Library/Ruby/Gems/2.6.0/gems/ffi-1.15.4/lib/ffi_c.bundle: mach-o, but wrong architecture
    	/Library/Ruby/Gems/2.6.0/gems/ffi-1.15.4/lib/ffi_c.bundle: mach-o, but wrong architecture - /Library/Ruby/Gems/2.6.0/gems/ffi-1.15.4/lib/ffi_c.bundle
터미널에서 ~/ios/ 이동 후 pod install 실행 시 역시나 에러 발생
changho@177802-RedmiBook-Air ios % pod install
Analyzing dependencies
/Library/Ruby/Gems/2.6.0/gems/ffi-1.15.4/lib/ffi/library.rb:275: [BUG] Bus Error at 0x00000001022f4000
ruby 2.6.3p62 (2019-04-16 revision 67580) [universal.arm64e-darwin20]

-- Crash Report log information --------------------------------------------
   See Crash Report log file under the one of following:
     * ~/Library/Logs/DiagnosticReports
     * /Library/Logs/DiagnosticReports
   for more details.
Don't forget to include the above Crash Report log file in bug reports.
인텔칩이 아닌 m1칩 관련 문제
다음 명령어로 gem 설치
sudo arch -x86_64 gem install ffi
arch -x86_64 pod install
조치 후 에러 없이 정상작동함.
pip 가 최신버전이 아닐 때에 flask를 설치하면, import 시
flask ImportError: cannot import name ‘escape’
이와 같은 오류가 발생한다.
pip 업그레이드를 위해 get-pip 를 설치한다.
curl https://bootstrap.pypa.io/get-pip.py -o get-pip.py
python3 get-pip.py
다만 python3 버전이 3.5 이하인 경우, 다음과 같이 실행한다.
curl https://bootstrap.pypa.io/pip/3.5/get-pip.py  -o get-pip.py
python3 get-pip.py
설치
sudo apt install tesseract-ocr
sudo apt install tesseract-ocr-kor
사용
tesseract -l kor test.png stdout
tesseract -l kor test.png output.txt
위키 : 링크

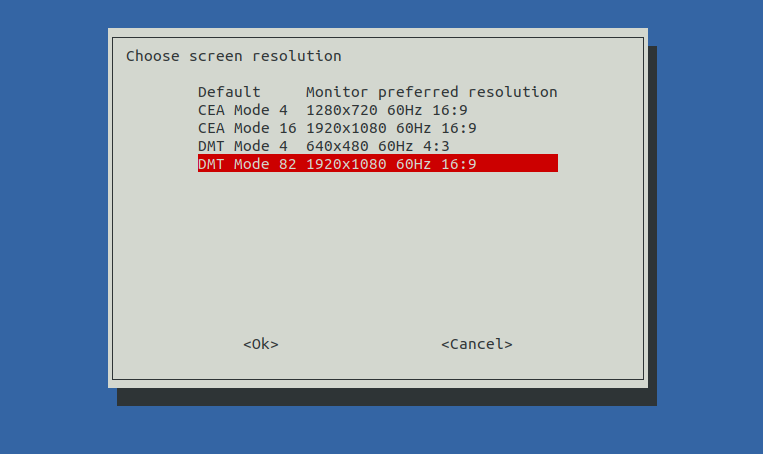
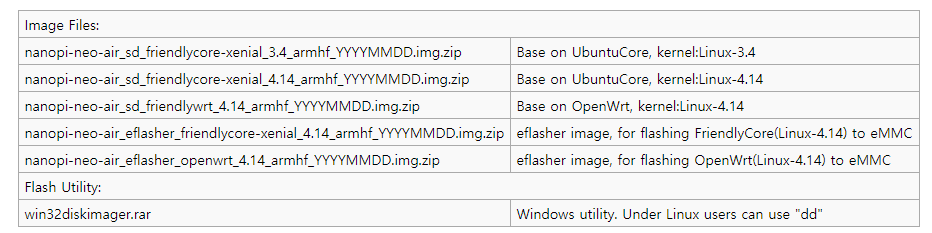
기본 리눅스 운영체제가 설치되어 있지만, 기기를 원활히 동작시키기 위해서는 추천하는 리눅스 운영체제를 설치하여야 한다. 위키에 관련 내용이 있으며, 간략히 설명하면 다음과 같다.
– OS 이미지는 이 링크에서 다운로드 할 수 있다.
–
2. 이미지가 기록된 sd 카드를 본체에 삽입한다.
3.usb to UART 커넥터를 이용하여 pc와 연결한다.
4.PC에서 putty를 이용하여 serial 연결을 시도한다. 이 때에 baudrate는 115200으로 설정한다.
5.다음 명령에 따라 새로운 리눅스를 설치한다.
$ su root
$ eflasher
The password for “root” is “fa”.
We take “nanopi-neo-air_eflasher_friendlycore-xenial_4.14_armhf_YYYYMMDD.img” as an example. After you run the “eflasher” command you will see the following messages:

Type “1”, select writing friendlycore system to eMMC you will see the following messages:

Type “yes” to start installation:

After it is done power off the system, take off the TF card, power on again your system will be booted from eMMC.
/etc/update-motd.d/10-header 파일을 수정